
If you meant to visit Manhunter: New York – Click Here.
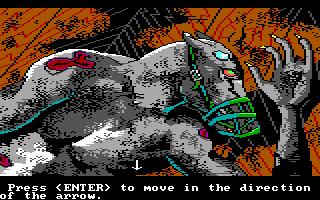
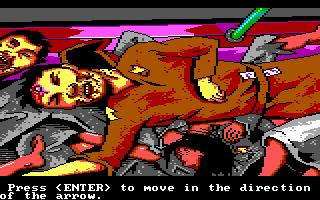
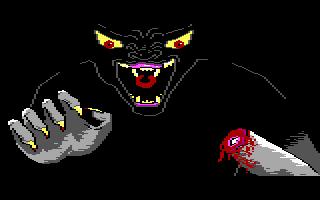
Here I am on an alien ship that I can barely fly! It was just a few days ago that I was forced to become a Manhunter for the Orbs in New York City. Soon, a trail of blood led me to a ruthless killer! I am now chasing him West as we descend into a new day. He has killed too many. I cannot let him get away. New York has been cut off from the rest of the world. What will I find when we land? Did the Orbs take over the whole world? Life has been miserable in New York since the invasion. All humans were required to wear brown robes and keep our faces hidden as much as possible. We were also not allowed to talk to each other. The penalty for breaking any of these rules was death. But that is over now, at least for New York. The Orbs cannot harm us. It is the robots that carry out the Orbs’ deadly bidding. These deadly machines are effective, many humans have met their end because of them. I wonder if the tracking disks can track me clear out here. The tracking disks were surgically implanted in the backs of our necks. But the Orbs have had problems with them. Apparently the disks can only transmit the location, but not the identity of the user. Thus, the need for Manhunters. A select number of humans were chosen by the Orbs to become Manhunters. I have no idea how the selection was made, or how I was chosen, but I sure gave them hell the last few days. We are getting close to the ground now, I had better concentrate on flying this bucket. – Excerpt from the Official Manhunter’s Field Guide |
|||||||||||||||||||||||||||||||||||||||||||||||||||||||||||||||||||||||||||||||||||||||||||
Walkthrough and Summary by Iceberg, Mike M. and Michael H. (Moneo)
HINTS:
DAY 1:
Q. I just crash-landed in San Francisco, and I think I squished someone on the way down!
A. Well, who is it? It’s definitely a spot of bad luck for them…but it could be very good luck for you! Any idea why?
Q. How do I use the tracker?
A. Your official Manhunter’s Field Guide states that “…the most efficient way to use the tracker is to watch it until it terminates transmission. Proceed to replay the transmission, closing MAD after the target leaves each location. Travel to the location shown and investigate.”
Q. OK, what should I do first?
A. Why don’t you go home and unwind for a bit? You’ve had a long flight. You do know where “home” is, don’t you?
Q. Alright, I found it – what should I do here?
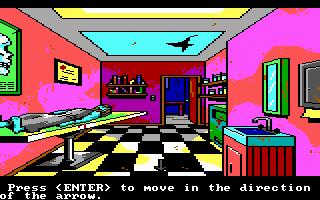
A. Look around, make yourself at home, have a peep out the window to see what kind of view you’ve got, rifle through things and pick up anything that’s not nailed down. It’s your pad now!
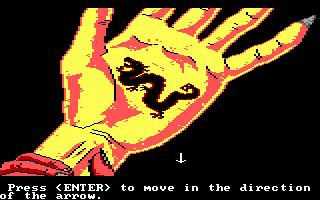
Q. I seem to have found myself investigating a break-in at the Bank of Canton. There are two dead bodies here, both with the same dragon tattoo on their left hands. What do those mean?
A. Believe it or not, they’re not tattoos. As for their significance, stay tuned!
Q. Inside the bank, there is a door with the words “bat vomit” on it. What on earth is that supposed to mean?
A. In all seriousness, why would an establishment like a bank have something like that on one of their doors? But wait, you came in through the hole in the wall and not through the main doors, didn’t you? Look where the words are positioned on the door and see if you can figure it out.
Q. The corpse on the street outside the bank has something embedded in its neck!
A. What is it? Does it make you at all nervous as to what sort of suspects you’re tracking here?
Q. I tracked my suspects to a warehouse on the waterfront. Something seems to have happened just inside the entrance! What went on here?
A. Isn’t there an old expression about there being no honor amongst thieves?
Q. I’m in the warehouse, but the robots keep killing me!
A. Open the tracker and watch the path your suspect took. If this sequence is too challenging, you can decrease its difficulty by hitting ESC and accessing the “special” menu.
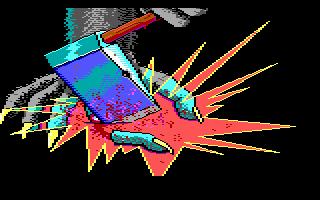
Q. I’ve made it into the back room and found a mallet. What should I do with it?
A. Look very carefully at the head of the mallet. Strange, isn’t it? What could it mean?
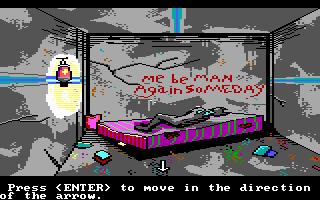
Q. I’ve found a message written in blood, but I’m not sure I understand it!
A. Your two suspects set out this morning to steal something and present it to their leader. Unbeknownst to one of them, however, the other is secretly serving a different leadership and has promised to bring this item back to them instead. Do you have any idea which of them came out on top after the fight?
Q. What did my first suspect do at the Ferry Building?
A. Look around the Ferry Building and the cause of all this commotion should be made clear. Your suspect returned here to report something – either success or failure. Do you know which it was?
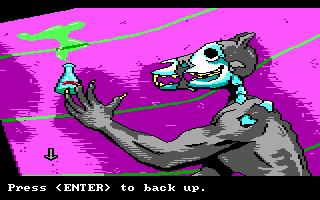
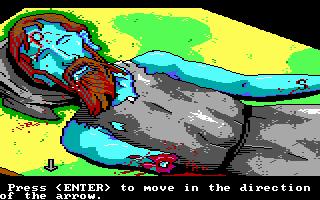
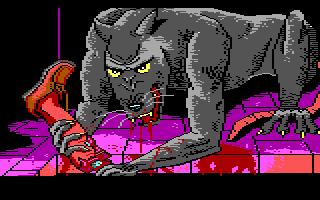
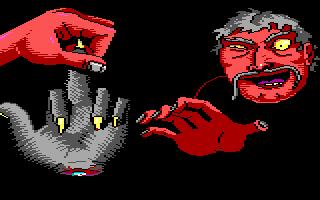
Q. I’ve made my way to Embarcadero Fountain – what on earth is this creature?
A. You’ve stumbled onto a pretty twisted plot. You’ll know soon enough what this thing is!
Q. So, what happened here?
A. Did you ever determine whether this suspect was successful in his mission or not? Let’s just say that he was rewarded accordingly!
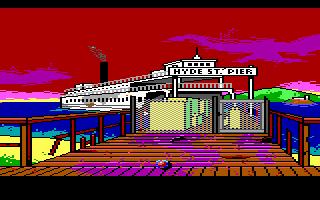
Q. I tracked my second suspect to the Hyde Street Pier. What should I do here?
A. Where did your suspect go? Better follow them. If misfortune should befall you, do not restore your game. Watch the Murrys’ message and then press Enter. One of the peculiarities of the game is that you need to die in this particular spot in order for things to advance.

Q. I tracked all of my suspects today and visited all of the locations they did. Now I don’t know what to do with myself!
A. Did you die at the Hyde Street Pier? If so, have you exhausted all of your other leads? Have you followed up on all of the information you’ve found today?
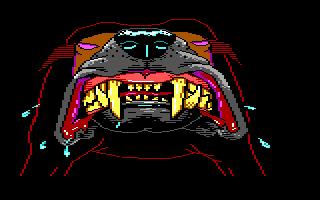
Q. OK, I found the one area I missed and went there to pay a visit. How do I deal with the vicious dog?
A. You don’t! At least, not yet. You may want to hold off until you’re better equipped to handle this situation.
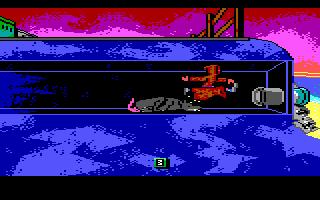
Q. What should I do with the dead rat-creature on the boat?
A. Examine the scene carefully. Are you able to tie this creature in with anything that went on yesterday?
Q. Is there anything else I should do here?
A. No, but before you begin tracking again, take a moment to stop and think. You should now be in a position to take care of some unfinished business from yesterday.
Q. OK, with my unfinished business now finished, I’ve discovered an unusual tapestry. What does it mean?
A. What could it mean? Think of it as a cause-and-effect statement. Take note of the words and the symbols. They will be important later.
Q. I’ve tracked my first suspect to the Temple. The stairs to the second level are lined with busts that all have different words beneath them. What do they mean? Is there anything to do here?
A. There are actually two things to do here. Look carefully through your inventory for clues.
Q. I’ve been given a rebus – what’s the solution?
A. Examine the clues. The last item seems to be the most troublesome one. The ruler isn’t as important as what’s on the ruler.
Q. I went through with the branding, and ended up dying! What did I do wrong?
A. Even hear the expression something for nothing? Why not try that approach here?
Q. What’s the significance of the scroll I’ve got?
A. Supposing west doesn’t mean what you think it means, what could it mean?
Q. I’m back outside, but the ninjas came and killed me!
A. What, you’re going to just hang out here after your escapades inside? Get a move on! And try heading in the right direction – if you get my drift!
Q. I’ve found an old man’s house – what do I do here?
A. This part is tricky, but you need to connect a couple of the clues you’ve found today in order to know what to do. Here’s a hint: the rebus from the Temple answers the what, and the tapestry at Tad’s answers the where and the why.
Q. I think I just had a mystical vision of some sort! What does it mean?
A. What happened in the vision? What was the old man’s reaction? If you put the two together, do you have any idea what it might mean?
Q. I’ve just been hustled out of the old man’s place. What now?
A. You could resume tracking suspects, but have you discovered any other leads to follow first?
Q. I’ve discovered a wax museum, but the door is locked and I don’t know how to get in!
A. Look around and see if any ideas come to you. Have you carefully examined all of the items you’ve picked up?
Q. I’m inside, but what is there to do here?
A. You can watch an Orb propaganda film and look at the various exhibits. How did you find this place, again? Is there anything else you should be looking for here?
Q. I was tracking my second suspect of the day. My investigation has led me to a rather unusual shop! What did my target do here?
A. What was the proprietor holding when you walked in? Any idea why? Do you know where it came from? Look at the postings on the wall. Your suspect got something from here – you don’t know what just yet, but you will soon!
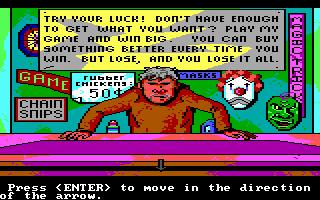
Q. How can I get to play this man’s game?
A. You can’t…yet. You need to ante up first, and you haven’t got anything with which to do so. Based on what you’ve seen so far, what do you think it will take?
Q. I watched my target leave The Shop and meet up with someone else. The two of them traveled to the Transamerica Pyramid. Who, or what, are all the “S” targets in the Pyramid?
A. Did you read your Manhunter’s Field Guide? Targets denoted by an “S” are special humans – slaves of the Alliance. They cannot be tagged or tracked by Manhunters.
Q. I am trying to rescue the terrified slave in the Transamerica Pyramid, but the Shepherd robot keeps killing me!
A. Did you read the Murrys’ message after you died? “This robot is quick – but there is a trick“. The Shepherd robot is smart. In fact, it’s often too smart for its own good. Can you find a way to outsmart it?

Q. I watched the tracker and saw two of my suspects kidnap an “S” target from the Transamerica Pyramid and take it to a doctor. I just arrived at the doctor’s house, and things don’t look so good here! What happened?
A. Make note of the various wounds on the two victims. Also notice the unconventional style of dress of the body on the table. Keep watching the tracker, making sure that you tag all possible suspects. You’ll soon see what went on here.
Q. I looked all around the doctor’s house. Then I searched the doctor himself and found a note. What does it mean?
A. Make sure you examine the note carefully for clues! Compare it against other inventory items you are carrying to see if anything catches your eye.
Q. Is there anything else I need to do here?
A. Yes! There is something else here, besides the letter, that you need to take with you. However, it’s not as easy as simply moving the cursor around until you find something you can pick up. Can you figure it out?
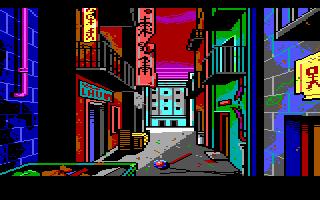
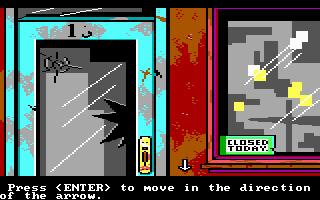
Q. My suspects dropped the “S” target off at the doctor’s and then split up. The one I’m currently tracking went into a laundromat in Chinatown. I can’t get in, though. How come?
A. Didn’t you read the sign? You can’t get in because the laundromat is closed today. But isn’t it strange that your target was allowed inside? Oh well, no laundry today; try again tomorrow!

Q. Since I can’t get into the laundromat, what should I do now?
A. You’ve tracked this suspect as far as you can, so you could move on to the next one. First, though, it might be a good idea to follow up on a few clues that should have panned out into a solid lead for you.
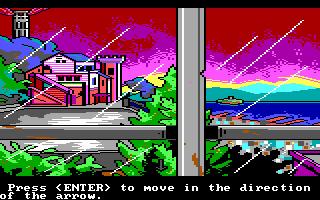
Q. My investigation has lead me to the house of a genetic research scientist. What’s there to do here?
A. Look out the window to see what landmarks are nearby. If you’ve been paying attention to the clues you’ve gathered so far, something outside should catch your eye. Search the house and read the files scattered on the floor. Try to tie things to the letter from Noah that you found in the doctor’s pocket. You should start having an inkling by now of what the Orbs are up to in San Francisco…
Q. I read the files, but I’m not sure they make much sense!
A. Did you have a good look at the file folders before you looked at the files?
Q. I watched the cut-scene of Phil killing the Rat King and taking the Viewer. Then I traveled to the Cable Car Barn. I went inside, but the robots keep killing me and I don’t know where to go!
A. Watch the tracker again carefully and observe where your suspect goes.
Q. I found a cable car full of bodies, and I think my suspect is one of them! The tracker showed him being killed by Phil, but before that happened he did something here. What was it?
A. Watch the tracker again. Your suspect is indeed languishing in the cable car. The clothes worn by the vast majority of the corpses should be a bit of a hint as to what the Cable Car Barn is being used for – where have you seen robes like that before? As for the tracking records, someone met your suspect here and gave him something. Do you know what?
Q. I tracked all my suspects on Day 2, and now I don’t know what to do with myself!
A. Have you followed up on all your leads? You should have discovered two places to investigate that none of your targets visited.
Q. I went to the Private Club and ended up getting killed. Is there anything to do here?
A. Now right now there isn’t! That place is crawling with rat-mutants. Better let it be for now.
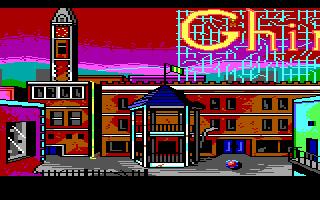
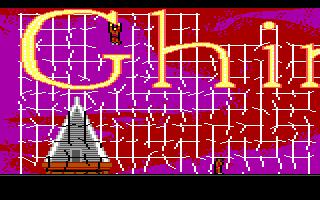
Q. I watched the tracker and then traveled to Ghirardelli Square. What happened here?
A. A few things! Your suspects came to Ghirardelli Square and one waited below while the other went up to break in. However, the suspect who went up got caught in the act, and the one who waited below got ambushed!
Q. I entered Ghirardelli Square and broke my flask while falling down the stairs!
A. That’s not so good. You’ll have to restore a game. Don’t actually enter the building here until you’ve gotten rid of the flask somewhere else.
Q. I climbed all over the sign and finally reached my suspect. When I try to take the ring from his neck, though, I end up getting electrocuted myself!
A. That’s right. Your suspect’s body is in direct contact with a powerful electrical current. What could help here? You know, this might just be a good time to leave Ghirardelli Square and do some backtracking to the locations at which you weren’t able to do anything yesterday. Old business before new, right?
Q. What do I do at the laundromat?
A. What do you normally do at a laundromat?
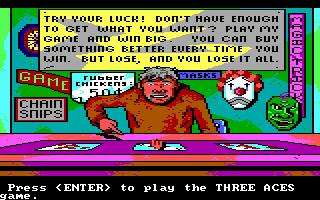
Q. Can I play the man’s game at The Shop yet?
A. You can if you pay up! You have no money – what do you think he’ll take as payment?
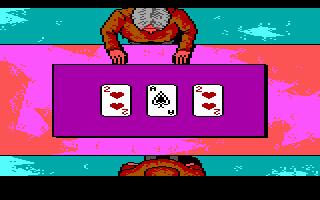
Q. I’m playing the game, but I keep losing track of the Ace!
A. Watch the cards very carefully. The proprietor is trying to fool you with a trick shuffle.
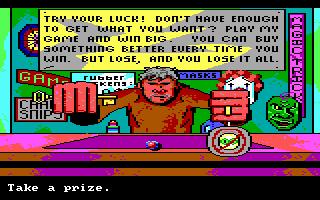
Q. I won! Which prize should I take?
A. You don’t have to take either of the first two prizes you are offered. Wait until you see something that you know will be really useful.
Q. How can I get into the Private Club without being killed?
A. Ask yourself the following question: this is a private club for who?
Q. I got into the Private Club and played a pretty disgusting dice game! Then the rats killed me! How do I get out of this mess?
A. It doesn’t look good, does it? You can use the camera flash to blind them, but don’t. You’ll need it later. You’ll need to think creatively. What do these rats want more than anything else? Can you trick them in any way?
Q. OK, I survived that…now what?
A. Did you ever end up looking into what your suspects were doing this morning in the first place?
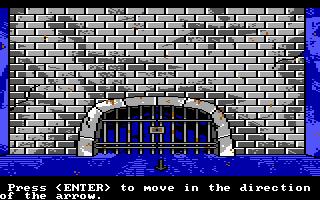
Q. I’ve found myself in front of a locked gate. How can I open it?
A. Look carefully at the lock. Have you seen this design anywhere else?

Q. I seem to have crashed Phil’s party, and now he’s thrown me to the rats! What do I do?
A. First of all, if you were quick, you should have managed to pick something up from the ground here. As for what you should do: think about it. These creatures spend most of their time underground, right?
Q. I’ve tracked two suspects to the Wax Museum, but I went inside and can’t find them. Where are they?
A. Both of their signals stopped moving once they got to the museum, so they have to be in here somewhere! Search carefully to see if anything looks different from the last time you were here.
Q. OK, I found them – what is there to do with the dead one?
A. Who is it? Can you identify the body? Look carefully for details, and see if you can match them to anything you’ve seen anywhere else. What could it mean? And what should you do? And how should you do it?
Q. I’ve tracked all my suspects today…now what?
A. Now you need to decide how you’re going to help rid San Francisco of the Orbs. Re-read Goring’s letter to the doctor. Any ideas yet?
Q. I’ve gone to where I believe Goring’s “creations” to be housed, but my current accommodations are less than satisfactory! How do I get out of here?
A. How did you get in?

Q. I’ve found Goring’s creations. What now?
A. Now you need to free them. But first, have a look in all of the cages. Do you see anything that looks familiar? If so, why is it familiar?
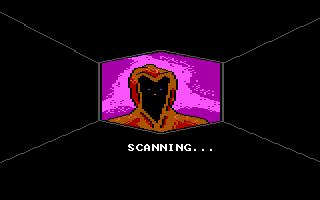
Q. I activated the scanner, but it killed me! Why?
A. Re-read Goring’s letter to the doctor. Did you find anything in your travels today that could help?
Q. I released the mutants, but they stomped me flat!
A. Everyone needs a friend sometime. Have you found one here?
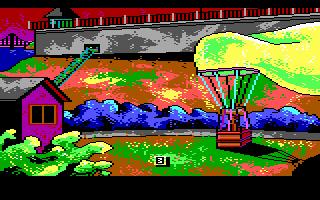
Q. I was carried away by a mutant and placed in a hot-air balloon. How do I take off?
A. Study the mechanism above the basket. What does the name of your current form of transportation imply?
Q. I’ve flown back over to the mainland. Where can I land?
A. The real question is where you should land. You can actually land just about anywhere in the city – but you want to land somewhere very specific. Read Goring’s letter to the doctor again, and then re-read the Dragon note you picked up at the Bank of Canton. Does that help?
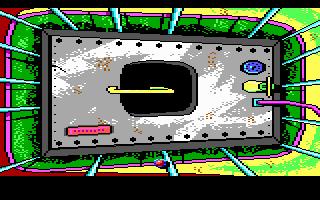
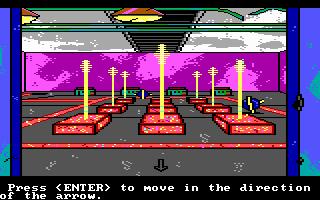
Q. I fell down a tunnel and landed in Hell. In front of me is a large control panel. What do I have to do here?
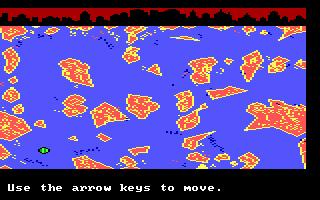
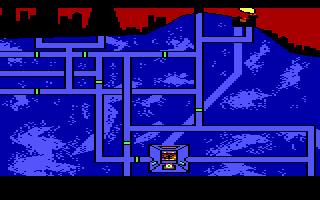
A. This part is challenging, but fun. Look at the control panel and move your cursor around the screen to reveal various messages – are any of the notes you’ve picked up starting to make sense yet? Look at the sensor buttons on the left side. The “Lava” sensor is currently selected, and all of the rooms currently flooded with lava are shown in yellow. Now select the “Slaves” sensor – all of the rooms marked in blue contain a slave. Finally, select the “Robots” sensor – each of the red rooms contain a robot. You can move the slaves and robots around by selecting them with the cursor. Lava gates are shown in green – an “X” indicates that a gate is closed, while an “O” represents an open gate. You can open and close the gates to control the flow of the lava. Be careful, though: once you have flooded a room with lava, it cannot be un-flooded. You have six main objectives here:
- Destroy the Orbs’ five main San Francisco strongholds by flooding the surface with lava.
- Destroy the underground robots with lava.
- Don’t accidentally charbroil any of the slaves.
- Don’t accidentally charbroil yourself.
- Don’t alert the surface robots by moving slaves to anywhere they shouldn’t be.
- Don’t flood so many of the rooms and tunnels with lava that you no longer have a clear path for you and/or the slaves to escape.
Good luck!
Q. I flooded the surface with lava, destroyed the robots and watched a cut-scene showing the mutants returning to normal. Now I’m looking at the control panel once more. What next?
A. Do you remember what the slave’s note says? Better hope you haven’t flooded too many of the tunnels.
Q. The slaves have put me into some sort of tunnelling machine, but I don’t know the code to make it go!
A. You’ve seen the code before. One of the slaves discovered it and had it marked somewhere on his body so he wouldn’t forget it. However, he was killed before he could put his knowledge to any use. Ring any bells?
Q. I’ve got the tunneller going, but I don’t know where to go!
A. Your goal is to get back above ground. Look for likely spots to burrow up. Good luck! And watch out for the pockets of lava!
WALKTHROUGH:
Warning: this section contains an explicit walkthrough for Manhunter 2: San Francisco. If this is your first time playing the game and you need help, try checking the hints section first.
Assignment: Unspecified
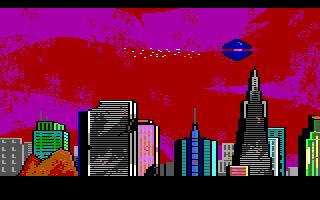
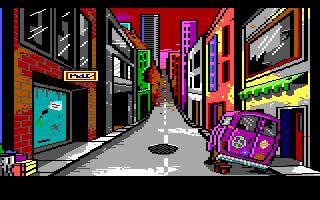
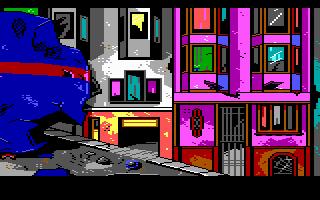
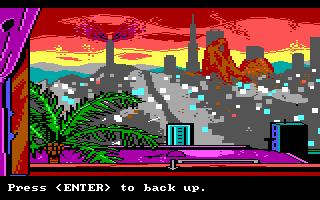
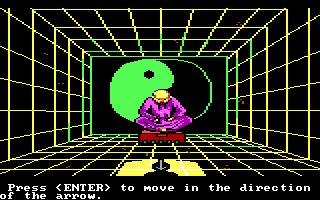
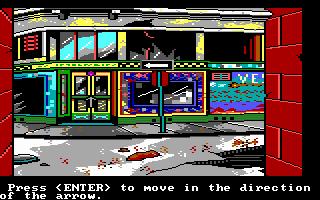
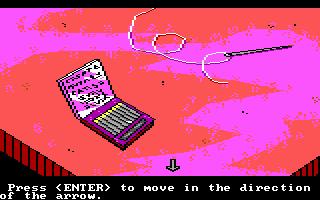
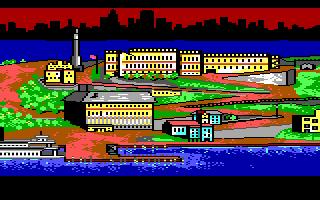
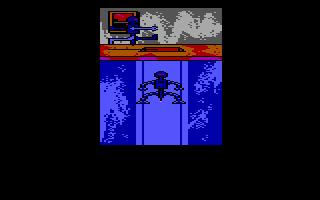
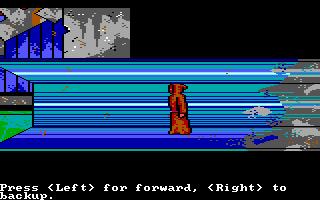
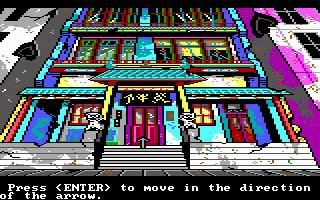
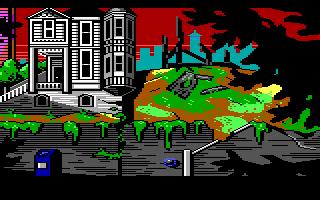
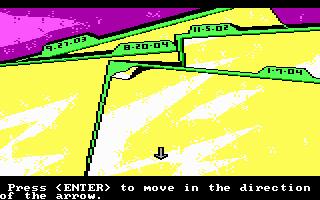
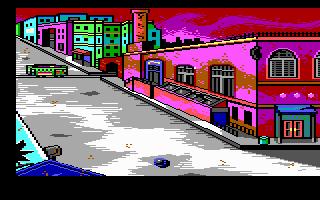
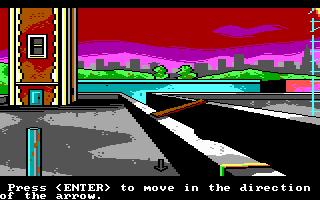
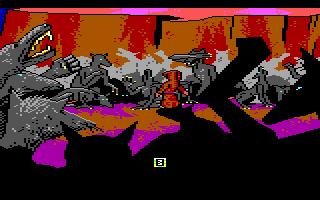
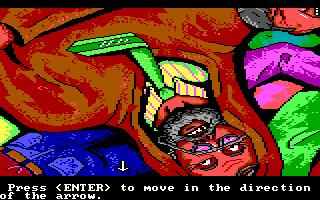
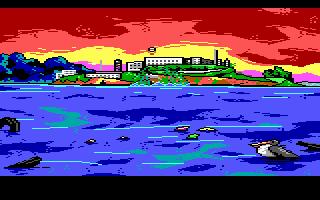
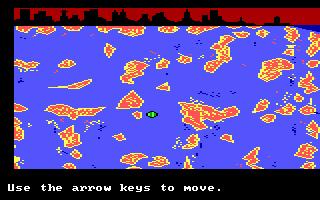
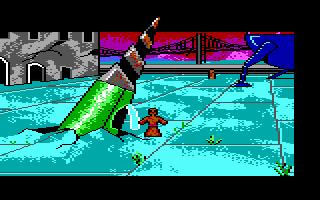
As the game begins, you are piloting a stolen spaceship out of New York in hot pursuit of Phil Cook – a dangerous serial killer and Orb ally. Phil flies west across the entire North American continent, finally descending towards San Francisco. The two of you fly over the ruined Golden Gate Bridge, past Alcatraz, over the city and finally down a narrow street. It is here that you fail to negotiate a turn and clip a building! Your ship crashes into the street below. Phil hovers overhead in his ship, laughing, and then flies off to land behind the Ferry Building.Scene of the Crash (Hyde Street)
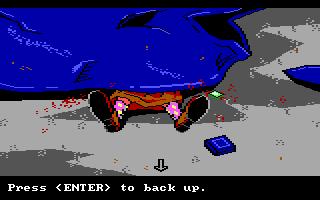
You landed on someone! Pick up the green card – it’s a Manhunter I.D. card. This man’s name is Peter Brown and he was a San Francisco Manhunter. Since his tracking signal must have been extinguished at almost the exact moment yours arrived, you should be able to avoid detection if you assume his identity and pretend to be him.Pick up the MAD (Manhunter Assignment Device) as well, and open it up. Access the Info feature and type in Peter Brown. You now have his address – no, make that your address!
Press F3 to travel and head “home” for the moment.
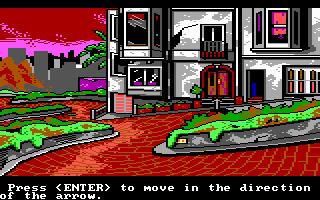
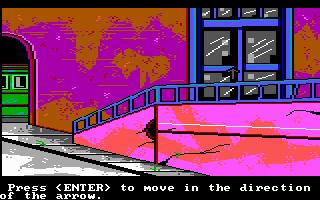
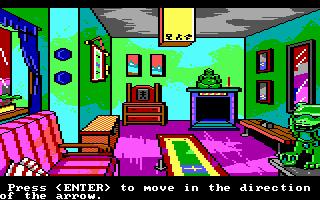
Home (Lombard Street)
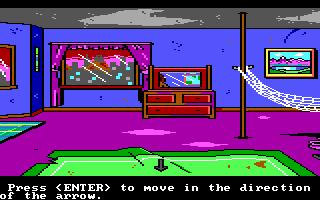
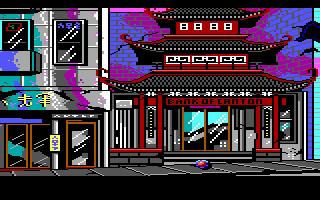
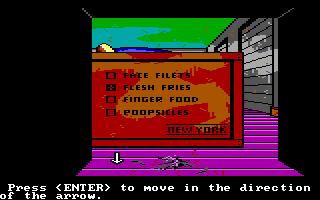
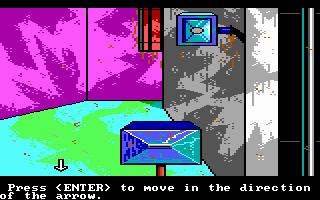
Look out the window and notice the red plumes spewing from Coit Tower as well as the mysterious mounds covering the buildings next to the Transamerica Pyramid, including the Bank of America Center. Now back up and open the top left dresser drawer. Remove the cloth from within and take it with you. Pay attention to the note pinned to the cloth.Since you’re supposed to be a San Francisco Manhunter now, you should probably do some manhunting. Pull out your MAD and access the tracker. You’ll see two targets breaking into the Bank of Canton. Keep watching until signal movement ceases. Then re-load the tracker and close MAD after your targets leave the bank. Press F3 to travel there.Bank of Canton (743 Washington Street)
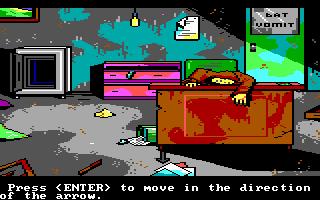
The front doors are locked, so you’ll have to enter the door just to the left – the same way your suspects went. Once inside, hang a right and notice the battering ram used to knock a hole in the wall.There are several interesting things to look at here. For starters, note the empty safe against the wall. Take the scrap of newspaper out of the garbage can. Read it and note the name Noah G. Look at the dead man’s face and left hand. Notice his unusual injuries and the dragon symbol on his palm. Take the note from the desk and look at it. Finally, look at the words on the window of the door – “bat vomit”. Remember that you didn’t come in through the front entrance – if you did, you’d be looking at the door from the other side. The mirror image of the words on the door is “Tad Timov”. Look again at the note you took from the desk and you’ll see that it was signed by someone named Tad. Open your MAD, access the Info feature and type in Tad Timov. You’ve got a hit – and an address, too!
Leave the bank and go back outside. According to the tracker, a third person appears to have chased your two suspects to the left, so head in that direction. The third person’s tracking signal stopped moving after he confronted your two suspects, so expect the worst.Sure enough, there’s a body laying on the sidewalk. Look at his left hand and you’ll see the same dragon mark as you saw on Tad. Now look at his face. It’s not a pretty sight! He has large fang marks on his throat, and there is actually a broken fang still lodged there. Remove it and take it with you. Pick up the laundry receipt from the sidewalk as well.
At this point, you may be wondering just what sort of suspects you’re tracking! Open your MAD and follow them to their next destination: a warehouse on the waterfront.
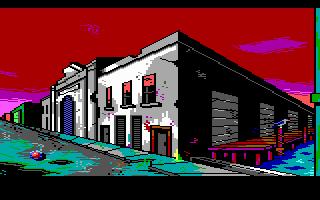
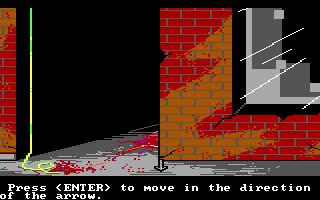
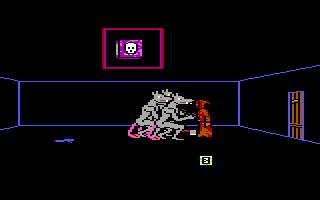
The Warehouse
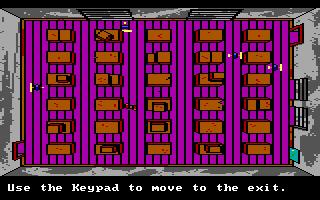
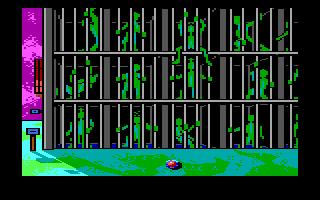
According to the tracker, your targets appear to have gotten into a fight at the entrance to the warehouse, after which one of them left. The other proceeded to make its way into the warehouse. Sure enough, there is a bloody clump of fur at the warehouse door. What sort of targets are these, anyways?There are four robots patrolling the warehouse. You need to make your way to the door at the lower left. Try taking a diagonal path. If this is too hard, try adjusting the difficulty setting to Normal (three robots) or Easy (two robots).
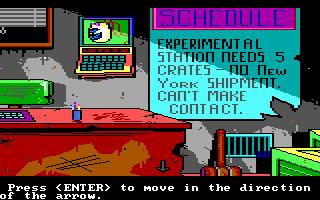
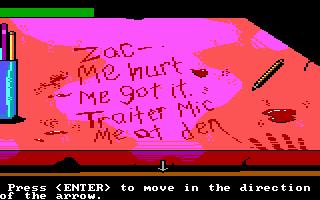
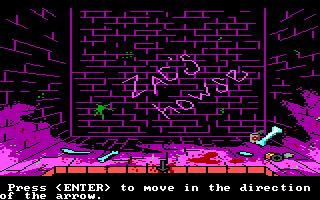
Once you reach the office of the warehouse, look around. Read the bloody message on the desk and make a note of the names Zac and Mic. Look at the shipping schedule posted on the wall – are you in any way responsible for that? Pick up the mallet and carefully examine the unusual markings on its head.
Now leave the office and make your way back outside. Load the tracker and watch as your first target travels to the Ferry Building.
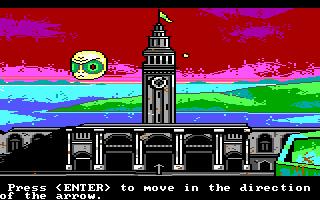
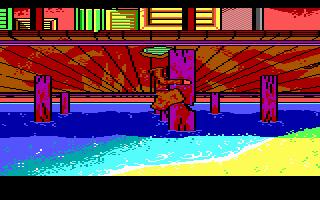
The Ferry Building (1 Ferry Building)
Your target went through the doors inside the Ferry Building, but they are barred to you. Read the poster over to the right. Since you cannot access the area your target visited, open your MAD. The tracker shows your first target’s final destination of the day: Embarcadero Fountain.Embarcadero Fountain (Embarcadero Center)
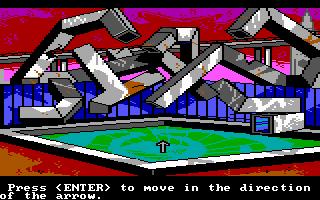
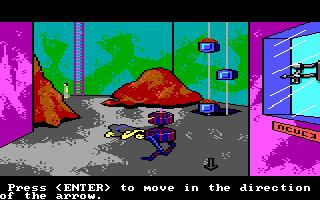
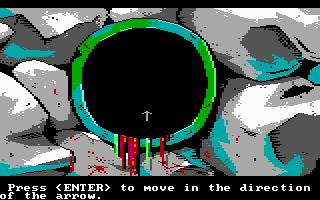
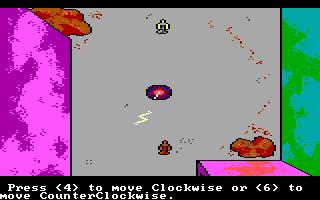
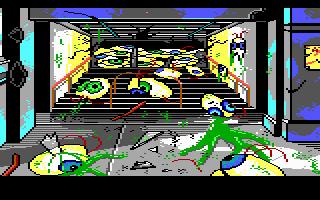
The water is off at Embarcadero Fountain and the sides are coated with slimy algae. Step forward into the fountain. You now need to spin towards the doorway on the right – careful, it’s slippery here – and stay away from the drainhole. Once you reach the door, you will enter a tunnel. Rats and bats will come at you from the right. Punch and stomp them until they stop coming. Then continue down the tunnel.You find yourself in a room containing the remains of a large rat-like creature. Read the scrawled message on the wall. Take the tattered driver’s license from under the mattress. Note the last name (Stone) and then examine the creature more closely. Take the empty flask from its hand.
Now back out of this room and walk back down the tunnel. Spin your way out of the fountain and you’ll find yourself standing on the edge once more. Pull out your MAD and access the Info function – it’s time to try connecting some of the names you’ve found. Type in Mic Stone – you’ve got a hit! Make a note of his occupation. Now load up the tracker and tag the second target at the Bank of Canton.Watch as the two targets travel to the warehouse, where they fight. The target you currently have tagged enters the warehouse and leaves the bloody message you saw earlier. Then he leaves and travels to the Hyde Street Pier. Keep watching until the target signal is lost. Now close your MAD and hit F3 to travel.Hyde Street Pier
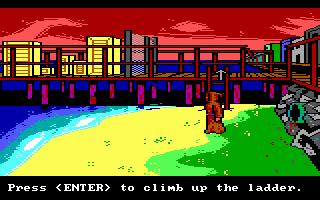
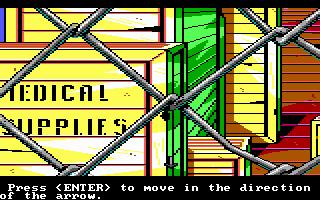
First, look through the chain-link fence at the crates of medical supplies on the other side. What could they be for, and why are they piled here? Now climb down the ladder on the left side of the pier. Your suspect entered the pipe in the wall, so take a closer look. Note the bits of blood and gore hanging from the mouth of the pipe. Now enter the pipe and watch until you get eaten. Do not restore a game here. You need to be eaten and see the Murrys’ message in order for the game to advance.
From the death message, press Enter to return to the mouth of the pipe. Now back away onto the beach.You’ve tracked all of your suspects for today, and figured out one of their identities, but there’s still one lead left that you haven’t followed up on. Press F3 to travel to the address you got earlier for Tad Timov.Tad Timov’s Apartment (Broadway & Columbus)
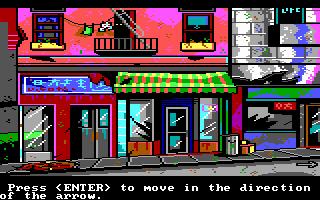
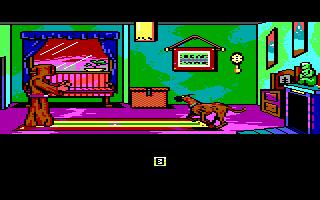
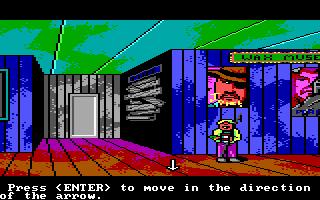
Go on into Tad’s apartment. If you linger a few seconds too long, you’ll have a snarling Doberman after you! Alternately, you can back out of the apartment before the dog appears. In any event, there’s obviously nothing more you can do here for the time being. Press F3 to travel.
Your MAD will be overridden by the Orbs, who demand that you report your findings for the day. You know that your first suspect’s name is Mic Stone, so enter that when prompted. You still haven’t managed to ascertain the identity of the second suspect, so press Enter or type Unknown. You will automatically return home.
Assignment: Investigate boat burning at Pier 5
Home (Lombard Street)
Your sector’s supervising Orb will arrive and give you your assignment for the day. Watch the tracker and until your first target’s signal is lost. Then restart the tracker and press C to close your MAD after your suspects leave Pier 5. Press F3 to travel.Pier 5
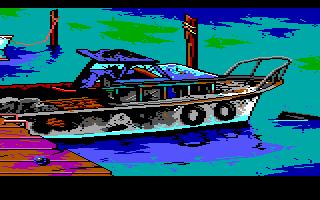
Step onto the boat and take a look around. It’s another rat-creature similar to the one you saw at Embarcadero Fountain yesterday! This one is also dead. Remove the muzzle and note the missing ring finger on its left hand. Now examine the creature’s mouth and look at the broken fang there. Select the piece of fang from your inventory – it’s a perfect fit! You’ve found your second suspect from yesterday!Before loading up the tracker again, though, head back to Tad Timov’s place first. You now have the means to deal with his Doberman.Tad Timov’s Apartment (Broadway & Columbus)
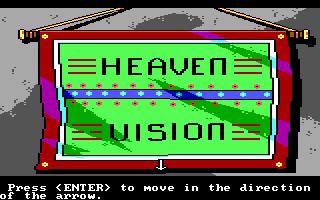
Step into Tad’s apartment and get ready. When the dog appears, select the muzzle from your inventory. Once you’ve dealt with the dog, you will be free to look around. Pick up the camera from the bench. This camera has only one flash left – don’t waste it. Now look at the tapestry on the wall and copy down the words and symbols it contains.You’re done here, so open your MAD and watch as your first suspect travels to the Temple.The Temple (Spofford Alley)
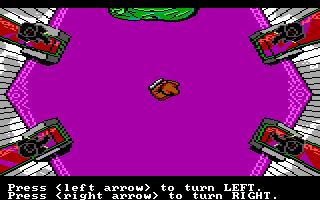
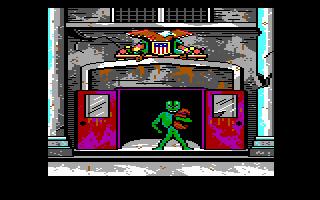
Walk into the Temple and pick up the shield on the floor. Four ninjas will appear and begin throwing shuriken at you. You will need to turn as required to deflect them with the shield. Adjust the difficulty setting if this section is too hard. After a short time, the ninjas will disappear and you will drop the shield. The Buddha at the back of the room will begin to rise, revealing a staircase behind it.

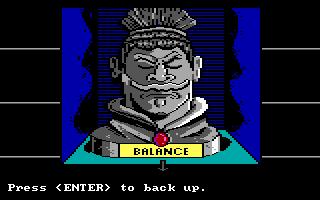
Go up and you will find yourself on a stairway lined with busts. Remember the note pinned to the cloth you took from your residence? Find the bust marked Heaven and use the cloth to rub its jewel. Watch as the bust gives you a rebus. Jot down the clues.Now select the Dragon note from your inventory and read it again. Going from the bottom, look at the third bust on the right, the first bust on the left and the fourth bust on the right. You have found a message – The Castle is the Gateway to Hell. Whatever could it mean?
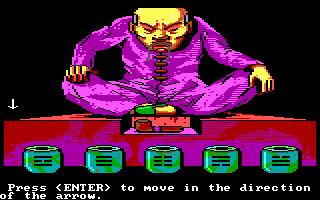
Continue up the stairs. Once at the top, you will be caught by ninjas and forced onto a long, shaky carpet suspended over a pool of acid! Follow the on-screen instructions and don’t forget to adjust the difficulty setting if you are having problems. You need to make your way across the carpet from left to right – without falling into the acid, obviously.
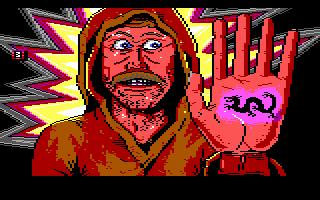
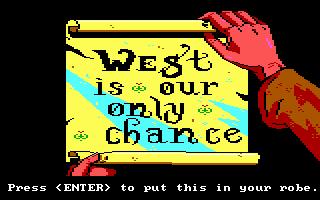
You seem to have found the leader of this mysterious clan! Watch as the man in front of you steps up to the branding iron and presses his left hand to it! When he pulls his hand back, he has the same dragon mark that you’ve already seen several times. The leader then hands him a scroll and he leaves. It’s your turn!Don’t touch the branding iron. Instead, run past the leader, grab a scroll and quickly jump out the window! You’ll land on the street below. Look at the words on the scroll – West is our only chance. Don’t linger here because the ninjas will be after you in a flash. Head next door immediately (over to the right).Old Man’s Residence (Spofford Alley)
Now that you’re away from the Temple, take another look at the scroll you picked up. West isn’t a direction – it’s a last name. Do you still have any unmatched first names? Open your MAD and access the Info feature. Type in Zac West – you have a hit and an address! Make a note of Zac’s occupation – it’s the same as Mic’s!Open the door and go inside. Approach the old man and you’ll see he is sitting in front of a pipe and five pots of tobacco, all with different markings. Think back and you should remember that you’ve already seen two of the markings on the tapestry at Tad’s. At this point, you need to put together a couple of the clues you’ve uncovered today. The first is the rebus given to you in the Temple:
F + oar + P + (a ruler with the inches marked on it)
The answer is four pinches. You need to take four pinches of tobacco from the correct pot. Remember that the rebus was given to you by the bust marked “Heaven” – that’s the pot you want.
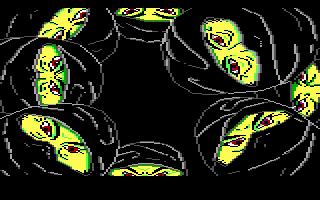
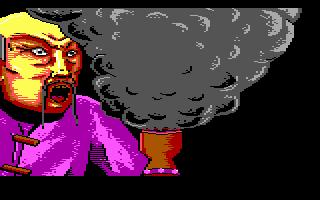
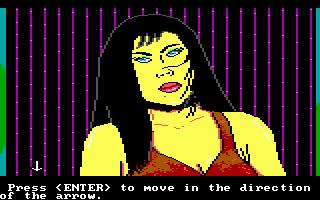
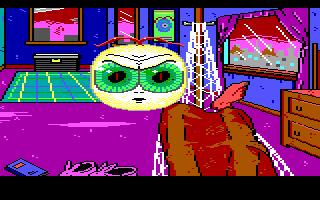
Next, consider the tapestry you saw in Tad Timov’s apartment – Heaven…Vision. Four pinches of tobacco from the Heaven pot will cause you to have a vision. Take four pinches from the pot with the Heaven symbol (second from the left) and place them in the pipe. Now pick up the pipe and smoke it.The old man watches, amazed, as a vision appears in the cloud of tobacco smoke. First, you see the face of a young woman appear. Then, before your eyes it transforms into the image of some kind of hideous green monster! Remember the monster’s face – it will be important later. The image dissipates and you find yourself looking at the old man once more.
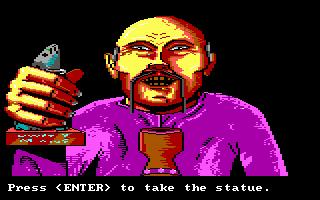
The experience has clearly affected the old man. With tears running down his cheeks, he hands you a small statue of a rabbit. Take it from him and note its inscription – To Daddy from Ming.You’ve done all there is to do here; but before you begin tracking your second suspect, travel to the address your MAD gave you for Zac West – it’s the Wax Museum in the Fisherman’s Wharf area.Wax Museum (145 Jefferson Street)
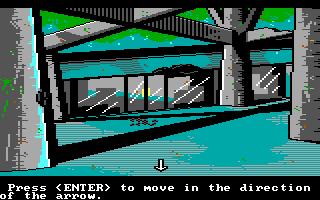
Walk up the Wax Museum. The door is closed and locked, but take a closer look at the weathered wax figure near the entrance – it’s a diminutive fisherman, complete with harpoon and fish. Where have you seen the image of a fish before? Of course – the mallet you picked up in the warehouse has the faint imprint of a fish on its head. Since it has clearly been used for this purpose before, take your mallet and strike the fish. You’ll trigger a hidden release, and the door will open. Enter the darkened museum.
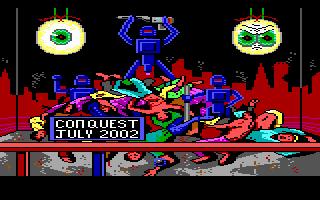
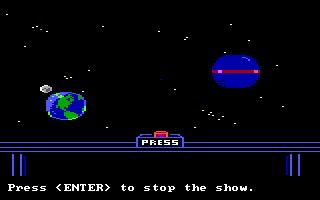
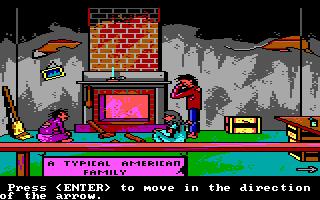
At the first exhibit, press the button and you’ll be shown a short Orb propaganda film. Now move to the left and you’ll see a display celebrating the Orb conquest of San Francisco in July 2002. Keep going to the left until you reach the final exhibit.Since your MAD gave you this address for Zac West, you should probably be trying to determine where in here he lives. Look again at the final display. Now enter the exhibit’s chimney and climb on up.
You’ve found where Zac stays, but he is not home. Judging by the looks of this place, that’s probably not such a bad thing, either! There’s obviously nobody here at the moment, so climb back down the chimney and leave the museum.Open up your MAD and load the tracker – it’s time to take a closer look at your second suspect. Tag the second target at Pier 5 and watch until the signal movement stops. Now restart the tracker and press C to close your MAD after your suspect leaves his/her second destination of the day – The Shop.The Shop (Larkin Street)
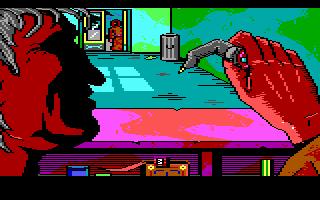
Open the door and go inside. The proprietor is contemplating a grey, long-nailed finger as you enter. Remember how the dead rat-creature on the boat was missing a finger? You’ve just found its whereabouts!The proprietor puts the finger away as you approach the counter. Read the large sign on the wall. You can’t play the man’s game right now because you haven’t got anything he’s interested in, but look at the other items and postings on the wall. Your suspect traded the rat finger for something, but you don’t know what yet.
You can’t do anything else here right now, so open your MAD and take another look at the tracker. Your suspect encountered another person while leaving this place, and the two went off together. Remember this, because you are authorized to investigate anyone your suspect comes into contact with. You’ll want to tag and track this person later. For now, though, follow both of them as they travel to the Transamerica Pyramid.Transamerica Pyramid (600 Montgomery Street)
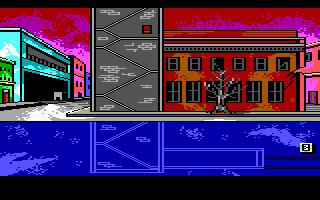
As you near the Transamerica Pyramid, take note of the debris falling from its upper windows, and the mound of rubble covering the nearby Bank of America Center. Clearly, something unusual is going on here. Let’s find out what it is.Approach the base of the Transamerica Pyramid. You’ll see that the doors had been chained shut, but the chains are now laying broken on the ground. Do you remember the signs on the wall at The Shop? Your suspect went there and traded the rat’s finger for chain snips. Then he/she met up with a friend, and the two of them came here and broke in. But whatever for?
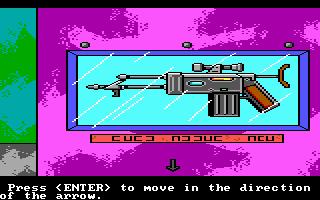
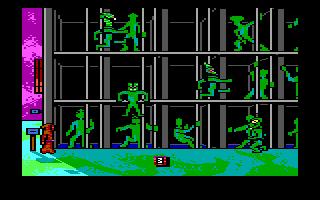
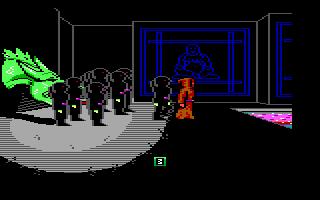
There’s only one way to find out. Enter the Transamerica Pyramid and look around. You’ll see a conveyor belt with buckets bringing up debris from below, enslaved humans scurrying around, and one slave cowering before a cruel Shepherd robot.Take a quick look at the glass case to the right and you’ll see it contains a gun. If you like, you can smash the glass and take it, although it has no power and is of no use in this game. If you do opt to take it, sirens will go off when the glass is broken. You will have to re-enter the Pyramid after fleeing outside.
It’s time now to try rescuing the poor slave. Move forward into the room. The Shepherd robot will notice and shift its focus off the slave and onto you. Now you need to move around the room. The slave will always stay directly behind the robot, away from its powerful electrical gun, so you will need to draw the robot’s attention away from the door in order for the slave to escape. To do that, you will need to go right into the room, to the point furthest from the door.However, the Shepherd robot will be shooting at you. It is clever and will try to lead you with its electrical blasts. You need to move quickly but cautiously. Watch the robot’s gun barrel. If you take a step and the robot aims its gun directly at you, quickly take another step forward. If the robot aims slightly ahead of you, stop moving or you will walk directly into its blast. Wait for it to re-calibrate and aim directly at you before moving again.
Once you’ve rescued the man, take a good look at his face before he runs off. Notice also that he is wearing a grey, short-sleeved robe instead of a standard full-length brown robe. Now load up the tracker and watch as your suspects steal an “S” target (special human/slave) from the Transamerica Pyramid and take it to a doctor.
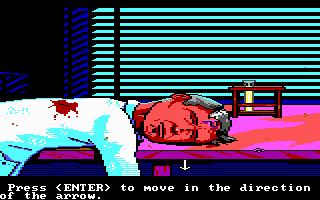
Doctor’s House (Taylor Street)
Go into the doctor’s house and have a look around. There are a couple of bodies here – and the carvings in their foreheads don’t leave any room for doubt as to who is responsible. First, look at the corpse on the examination table. Note his missing right arm, the “P” carved into his forehead, and the “S” (slave) mark on his left forearm. He is also wearing the same short-sleeved grey robe as the slave you rescued from the Transamerica Pyramid – notice a pattern yet?Now back away and enter the doctor’s room. Notice that he also has a “P” carved into his forehead. Search him and you’ll find a note. Read it and take note of the name N. Goring. There is a urine sample on the desk – pour it into the empty “remedy” flask you are carrying and take it with you.
Now compare the newspaper clipping you have to the letter you just took. One has the name Noah G. while the other has the name N. Goring. Open your MAD and access the Info function. Enter the name Noah Goring. You’ve got a match! Note his occupation and address – you are able to travel there now.First, though, continue following your current suspect’s tracking record to its conclusion. After leaving the “S” target at the doctor’s, your suspects split up. The one you’re tracking right now heads to a laundromat in Chinatown.The Laundry (Beckett Street)
As you enter this alley, the laundromat is just on the left. Take a closer look – it’s closed today. How, then, did your suspect get in? The answer: it’s a family-run business, and your target is family.Maybe it’ll be open tomorrow. There’s nothing more to do here. Before you start tracking your next suspect, however, it’s time to drop in at Noah Goring’s place.Scientist’s House (Montgomery Street)

Enter the house through the garage and take a look around the living room. There are a couple of items on one of the end tables. Take the matchbook and make note the needle and white thread. What could Noah have used it for?Now glance out the window. From here, you can see Coit Tower, Alcatraz and Julius Castle. Hmmm…several of the clues you’ve picked up so far have mentioned a castle – could this be one?
Now take a look at the files scattered on the floor. Pay attention to the dates on the tabs of the folders to ensure that you are reading the files in chronological order. You will learn some rather interesting things about the Orbs’ plans!
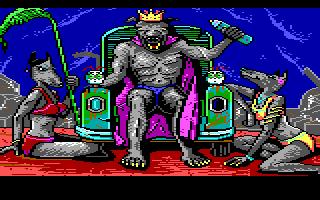
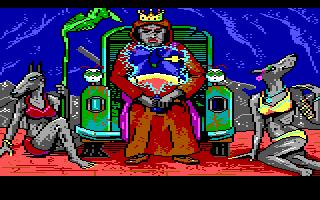
You will now see a short cut-scene. First, there is the King of these creatures (now revealed to be rat-dog-human crosses) sitting on his throne – a Volkswagen Beetle – and holding the Orbs’ missing Viewer. Suddenly, Phil runs in and stabs the King to death! He puts the crown on his head, picks up the Viewer and parades around triumphantly. Guess who’s just proclaimed himself the new King of the Rats?!
It’s time to load up the tracker again, but this time the target you’ll be tracking is not one of your original two. So, tag the second suspect at Pier 5. Then tag the person your suspect meets outside The Shop. These two travel to the Transamerica Pyramid, where they kidnap a slave. They then bring the slave to a doctor before splitting up. The target you’re currently tracking goes to the Cable Car Barn.Cable Car Barn (1201 Mason Street)
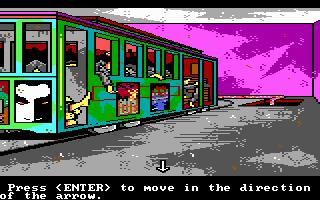
Walk up to the Cable Car Barn. If you look through the upper doors, you will be able to see down into the power house. Uh oh – there are robots in there! Back away from this view and ride the next cable car in.
Now you need to follow your suspect’s path and flip a switch that will allow you access to the parked cable cars on the right side. The switch is on the right side of the generator in the top right corner. Ride the cable car until you are close, then hop off and be quick! Watch out for the robots. Move right up to the side of the generator where the switch is located. Pull it, and back away from the generator. Go to where the hidden door just opened and enter it.
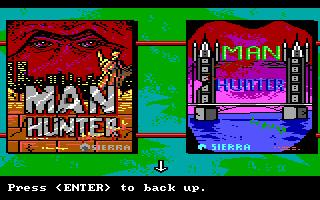
Approach the parked cable car, and you’ll see that it is full of corpses! Take a moment to look at the side of the car – you’ll see posters for Manhunter: New York and Manhunter 3: London. Now look into the car itself.You’ve found your suspect! The tracker showed that he entered the Cable Car Barn and was met by a slave who secretly sneaked up from the underground tunnels where he was working. The slave slipped him a note before going back underground. As your suspect was leaving, Phil and an accomplice entered the Barn and killed him!
Examine your suspect. He has Phil’s trademark “P” carved into his forehead. He also has the brand on his left palm that indicates he is one of the Dragons. Take the letter from his belt and read it.It is also worth paying attention to the type of robe worn by the rest of the corpses stacked in the cable cars. It shouldn’t be too hard to guess where these poor souls came from…
Phil’s erratic signal will not allow you to track him directly, but you can tag his accomplice. Load up the tracker. Tag the second suspect at Pier 51, and then tag the person this suspect meets outside The Shop. Wait until this person is inside the Cable Car Barn and then tag the person who enters with Phil.
Phil and his accomplice leave and travel to the doctor’s house, where they kill the doctor and the slave that was rescued from the Transamerica Pyramid. So that’s what happened there! After leaving the doctor’s place, Phil heads off on his own (to go kill the Rat King) and your suspect goes to a private club in the Fisherman’s Wharf area, where signal movement stops.Leave the Cable Car Barn the same way you came in – by riding a cable car to safety. When you press F3 to travel, the Orbs will override your MAD and demand that you report your day’s findings.
You’ve learned a lot, but it hasn’t been a very successful day for manhunting – you haven’t managed to learn the identities of either of your primary suspects, and they are both still at large. Press Enter or type “Unknown” when the Orbs prompt you for names. You will automatically return home.
Assignment: Investigate body on sign at Ghirardelli Square
Home (Lombard Street)
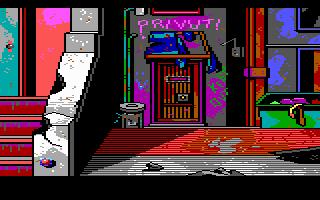
Your supervising Orb gives you your daily assignment. Before you begin tracking, however, travel to the Private Club (unless you already visited it yesterday).Private Club (Bay Street)

Your suspect from yesterday went inside, so walk up the stairs and knock on the door. The slot in the door will open, revealing a pair of definitely non-human eyes! Watch as you get the life squeezed out of you. This place is definitely not friendly to humans!Now that you’ve established this as a dangerous place to which you will not gain easy access, you may as well check to see if the laundromat is open today. Press F3 to travel.The Laundry (Beckett Street)

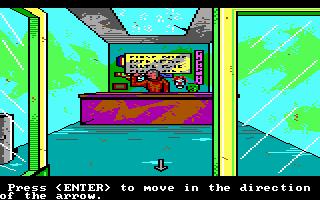
Walk up the alley to the laundromat and look at the sign. It’s open! Go inside and walk up to the woman near the counter. Hand her the laundry receipt that you took from the dead Dragon near the Bank of Canton. She’ll go into the back room briefly, and then re-emerge.

When she comes back, she will give you a come-hither wink and beckon you to follow her into the back room. When you do, a man behind the door hits you in the back of the head with a club and knocks you out. It’s a trap! Before you hit the floor, though, look at the face of the third person in the room – it’s the slave you rescued from the Transamerica Pyramid yesterday!
Apparently bringing in a laundry ticket for a dead man’s clothes raised a few eyebrows in the back room! The proprietors may have thought that you had something to do with the murder. Your unconscious body is dragged into a storage room, and the door locked. A few hours later, you awaken in the darkness with a terrible headache! Suddenly, the door flies open to reveal a figure standing there. The slave you rescued from the Transamerica Pyramid is now rescuing you!

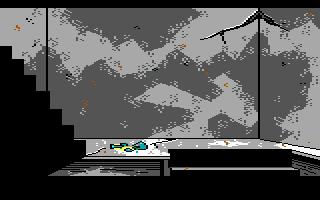
Your benefactor leaves once he has opened the door, and you are free to do the same. Before you go, though, grab the walking stick in the corner. Now go outside.It’s time to actually do some manhunting, so open your MAD and load the tracker. Watch as your target is chased around the sign at Ghirardelli Square and finally ends up getting electrocuted. When signal movement ceases, press F3 to travel.Ghirardelli Square (900 North Point Street)
You’ll see a rope hanging down the left side – that’s how your target ascended. Move towards the rope. You’ll see a bloody rat’s paw on the ground, and a trail of blood leading into the shadows! Pick up the paw and take a look into the darkness. You’ve found the paw’s owner!
Maybe following the trail of blood wasn’t such a good idea after all! This time, climb the rope instead. You will find yourself on the roof. Cross the plank over the gap between the buildings. Your suspect’s body hangs from the sign high above you.Now you need to climb the broken framework to reach your suspect. The sign was damaged at the same time as he was electrocuted, and sparks are raining down from above. Don’t get hit! Remember to adjust the difficulty setting if this section is too hard.
Once you reach your suspect, don’t touch him! His body has a powerful electric current coursing through it. Take the wooden walking stick you got from the laundromat and use it to remove the ring from the man’s neck. Look carefully at the design of the ring.Now climb down the sign (you can fall if you like) and prepare to leave. You have something in your possession that will be of great interest to the owner of The Shop.The Shop (Larkin Street)
Step into The Shop and you will again see the proprietor admiring the rat’s finger. If he likes the finger so much, how about a whole paw? Walk up to the counter and give him the rat’s paw you took from the ground at Ghirardelli Square.You can now play his game. Keep your eye on the Ace and be careful – sometimes he will switch cards and sometimes he will only pretend to do so. Win three times and you’ll be presented with your choice of either a lantern or a flashlight. Don’t take either. Play again, and he will offer you one of two rat masks. Select the mask with the eye holes.
Now you can try gaining admission to the Private Club again. Press F3 to travel.
Private Club (Bay Street)
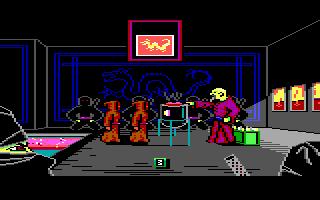
Go up the steps and look at the slot on the door. Don’t knock yet, though! First, put on the rat mask you won at The Shop. Now rap on the door. The club’s denizens will open it and let you in.The rat-mutants inside are playing a rather macabre game – rolling dice for body parts! The first bets an arm. Look carefully – that’s the arm that was missing from the dead slave at the doctor’s house! Note the “S” mark on the inside of the forearm, and write down the letters engraved on the palm.
The rat rolls the die and wins. Another rat picks up the die and throws it – he’s not as lucky! Watch as he chops off his own finger in payment and gives it to the winner!
Do you have a feeling this is a game you don’t want to be playing? Unfortunately for you, it’s your turn. You roll the die…and lose! You’re lucky, though, because before you have to give up any body parts the rats begin to smell…well, a rat!One crawls up to you and pulls off your mask. Things are looking pretty dire, so it’s time for a desperate ploy. Pull out the flask of urine and give it to them. The “remedy” label will fool them, and they’ll think it is a cure for their condition! While they’re fighting over it, quickly grab the hatchet. Be sure that you’re out the door before they realize that you tricked them, because they won’t be very happy!
Now it’s time to do a little more investigating. Head back to Ghirardelli Square and see if you can determine what your first suspect was doing there.
Ghirardelli Square (900 North Point Street)
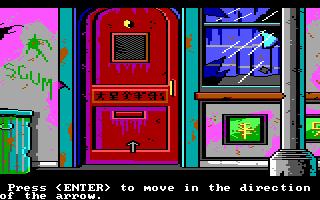
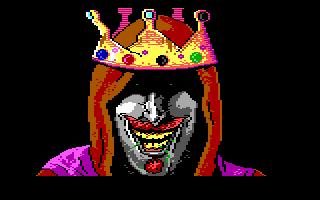
Climb up to the roof using the rope. This time, instead of going right, enter the window to the left. You’ll trip and fall down the stairs (good thing you don’t have that fragile flask any more) and find yourself in front of a locked gate. Examine the lock design. Use the special ring that your suspect had around his neck to open it.A short cut-scene follows, showing Phil – the new Rat King – using the Viewer to look in on the Orbs’ underground operations. It looks like they’re getting pretty close to a big pocket of lava!
Meanwhile, you are now crawling on hands and knees down a narrow tunnel. Suddenly, the floor collapses and you find yourself falling – brace for impact!You crash through the roof of the rats’ throne room and land directly on top of Phil, knocking him to the ground! The Viewer flies out of his hands, lands right beside him, and explodes. Debris falling from the hole in the roof knocks one of the ornamental Orbs off the throne. Very quickly grab it before Phil has time to recover.
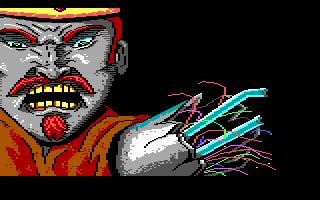
Phil is furious! The exploding Viewer has blown off one of his arms – revealing that he is part robot! The Orbs in New York experimented on him so heavily that he is now more machine than man. Enraged, he picks you up and throws you to the rats.Remember the camera flash that you’ve been saving for just the right moment? Well, this is it! Use the camera and you will blind the rats.
This would probably be a good time to get out of here! You flee the cavern, jumping over a guard rat in the process. When you emerge back into the open, you find yourself on the beach near the Hyde Street Pier.That was exciting, wasn’t it? However, it’s time to go back to work – you still have suspects to track. Pull out your MAD and load the tracker. There are only two targets that actually leave Ghirardelli Square, and they both go directly to the Wax Museum. Target movement ceases there for both. Close your MAD and press F3 to travel.Wax Museum (145 Jefferson Street)According to the tracker, your final two suspects of the day both came here. One ended up in the second exhibit while the other went up the chimney. Hit the fish with the mallet to trigger the hidden release and open the door. Go in and head to the second display.
There’s an extra body on the pile…it’s Noah Goring! Look at his tie, and remember the needle and white thread you saw in his apartment. Select the fang from your inventory. You will use it to slit the thread and retrieve an Orb card that was hidden in the tie.You know from watching the tracker that Zac is home now, but it’s probably best to avoid meeting him if you can possibly help it. Slip out of the museum to the right and head back out onto the street.
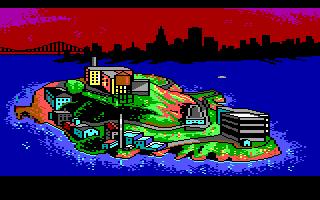
Now it’s time to put Goring’s plan into effect. You know from reading his letter to the doctor that his “creations can help but must be freed by an Orb”. Now you have to make your way to his “creations”. Do you remember the crates of medical supplies at the Hyde Street Pier? They’re going to Alcatraz Island…and so are you.
Hyde Street Pier
Climb down the steps on the left, and enter the water. Now shinny up the pier support. There is a hole in the pier, but there is a crate covering it. Take your hatchet and chop a hole in the crate – now you can hide inside.

A cut-scene follows, showing a barge arriving and the crates being shipped across to Alcatraz. A robot unloads the barge and brings all the cargo to a warehouse in the old prison.Alcatraz Island
Once your crate is placed in the warehouse, use the hatchet to hack your way out. You’ll trip over a box lid and lose the hatchet, but don’t worry – you won’t need it again. Make your way through the doorway to the left.
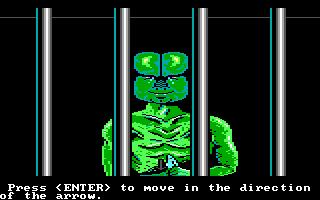
It looks like you’ve found the creations Goring was referring to – a failed reptile/human cross that preceded the rat/dog/human mutants that you saw on the mainland. Look through the cages until you see one that looks familiar. The face of the mutant in the second cage of the middle row is the same face you saw in your vision at the old man’s house! Remember the statue he gave you? This must be Ming – his daughter. Give the mutant the statue.
Now it’s time to work on freeing the mutants. Go up to the scanner to the left of the cages and insert the Orb card you got from Goring’s tie. Remember the letter saying that his creations must be freed by an Orb? Inserting the card activates a scanner. Hold up the Orb-on-a-stick that you got from the rats’ underground lair. You’ve fooled the scanner, and the cages are open!
The mutants are loose…and they’re angry! Fortunately, you gained Ming’s favour by giving her the statue from her father. She picks you up and carries you along as the mutants rampage across the island. Hang on!
The entire mob pours out of the prison and plunges into the ocean – heading for the mainland. Fortunately for you, Ming takes the time to set you down in a nearby hot-air balloon. She waves goodbye and then runs off to rejoin the horde.
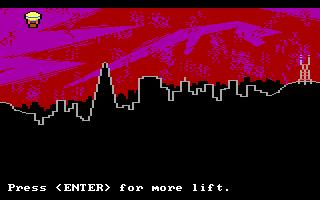
Take a look at the mechanism just above the basket. Turn the handle to activate the gas flow. Now use the matches you took from Goring’s apartment to light the gas. You’re off!
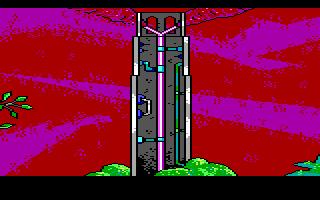
You’re now flying over the city in search of a good place to land. You can actually land anywhere you like, but you are looking for someplace very specific. Look again at Goring’s note to the doctor – “you must reach Hell, but all entrances are guarded“. Now consider the meaning of the Dragon note you picked up at the Bank of Canton – “the Castle is the gateway to Hell“. Do you remember seeing Julius Castle through the window of Goring’s apartment? That’s where you’re going to land – it’s the battlemented structure just below Coit Tower.Julius Castle (1541 Montgomery Street)
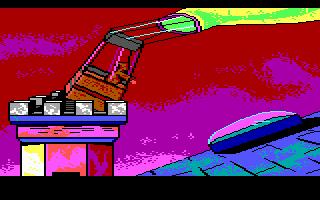
The balloon comes to rest squarely atop one of the towers of Julius Castle – a perfect landing! You’ve got quite a bit of momentum built up, though, and you are pitched forward when the balloon snags the battlements. Over the edge you go, out of the basket and through a nearby skylight. Where are you going to end up this time?Hell
You plummet down a shaft and land in front of a control panel, squashing the Orb who was working there. Welcome to Hell! You’ll have to wait a few minutes before you can explore this place, though, because the mutants you released from Alcatraz have just reached the mainland.
You’ll be shown a cut-scene in which the mutants rage through the city, killing Orbs wherever they find them. One plants a bomb at the Orbs’ headquarters – the Ferry Building – which makes quite a mess! It’s nice to see that your efforts have had some positive results. Right now, though, it’s time again to focus on the task at hand.
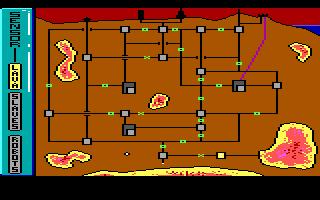
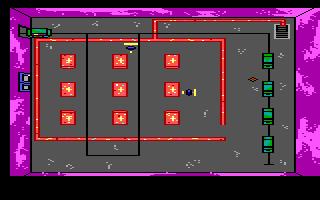
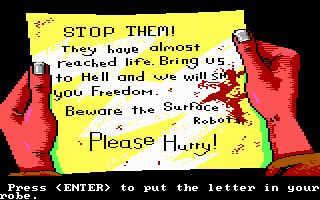
Look at the control panel. Move the cursor around the screen to reveal various messages. Notice that the giant pocket of lava is code-named “Life” – so that’s what the slave’s note meant by “They have almost reached life“!Look at the sensor buttons on the left side. The “Lava” sensor is currently selected, and all of the rooms currently flooded with lava are shown in yellow. Now select the “Slaves” sensor – all of the rooms marked in blue contain a slave. Finally, select the “Robots” sensor – each of the red rooms contain a robot. You can move the slaves and robots around by selecting them with the cursor. Lava gates are shown in green – an “X” indicates that a gate is closed, while an “O” represents an open gate. You can open and close the gates to control the flow of the lava.
To solve this puzzle:
- Close all of the lava gates.
- Move all of the slaves into the room code-named “Slavery”.
- Move all of the robots into the room immediately above “Life”.
- Open the lava gate immediately above and to the right of “Slavery”.
- Open the lava gate directly above the room that now contains the robots.
- Open the lava gate to the left of the only room currently flooded with lava.
You will now see another cut-scene depicting the destruction of the Orbs’ major strongholds. Also, Goring’s experimentation is beginning to wear off, and the mutants are returning to normal. Finally, you will see the robots being destroyed by the lava you have unleashed.When the scene ends, you are still in front of the control panel. Do you remember the section of the slave’s note that reads “Bring us to Hell and we will show you Freedom“? Look at the control panel again, and select the “Slaves” sensor. Now move all of the slaves from “Slavery” to “Hell” (the room you are currently in).
Assuming you haven’t flooded too many of the tunnels with lava, the slaves will arrive in the control room, hoist you onto their shoulders, and parade you around triumphantly. Then they will take you down a passage to the room code-named “Freedom”
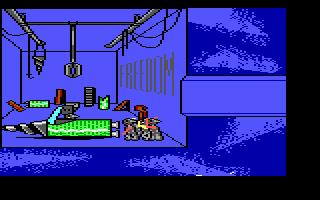
Freedom
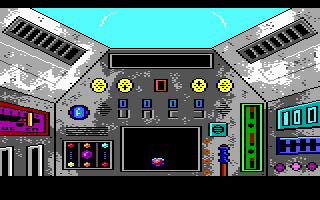
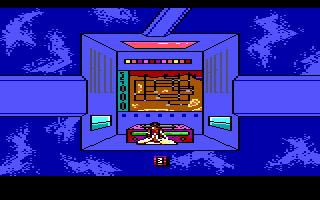
The slaves enter the room, still carrying you on their shoulders. There is a tunnelling machine here with a large bore bit on its front. You are deposited into the cockpit. Looks like there’s only one way out of here!You are now sitting in the tunnelling machine. Before you is its console. You need to enter the correct code to activate it. One of the slaves discovered the code and marked it on his hand before being rescued from the Transamerica Pyramid. He was then killed before he could do anything with the knowledge. Do you remember the severed arm the rat was gambling with at the Private Club? The code was on that arm – UNNC. Punch it in and then press the top button. Now look at the display screen. You’re off!Below the City
You are now tunnelling through the rock beneath San Francisco, with pockets of deadly lava all around you. Your goal is to tunnel up behind the Ferry Building, right on the water’s edge. Good luck!The Ferry Building (1 Ferry Building)
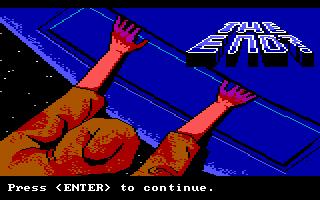
Once again, Phil is less than pleased with your success. You burrow up behind the Ferry Building just in time to see him running for his spaceship. You make a mad dash for the ship and attempt to leap aboard, only to have your fingers caught in the closing door! The ship takes off with you hanging precariously underneath. Phil flies out of San Francisco and takes off across North America, heading east.

Well done! Phil is still on the loose, but you’ve managed to free San Francisco from Orb rule. Congratulations! Next stop: London!
|